Managing Record Series
On the Record Series tab and the Record Series Details page, you can add, edit, copy, merge, delete, and inactivate a record series to reflect internal changes, work changes, new product lines, and new jurisdictions. On the Record Series tab, you may also be able to perform a mass edit to update field information for multiple record series or request the attestation for a record series. And on the Record Series Details page, you can also create an record series exception.
Proper maintenance keeps your retention schedule up to date and communicated throughout your organization.
In the Setup feature, Administrators and others with permissions determine the values you can select for the record series fields. For example, the values of the Status field are determined by the Record Series Status tab in Setup. Record Series Status also determines when a record series is eligible to be published to the Virgo Employee Portal.
 This Help topic includes the following sections:
You will learn how to edit, add, copy, merge, delete, and inactivate record series in your retention schedule.
Length: 4 minutes.
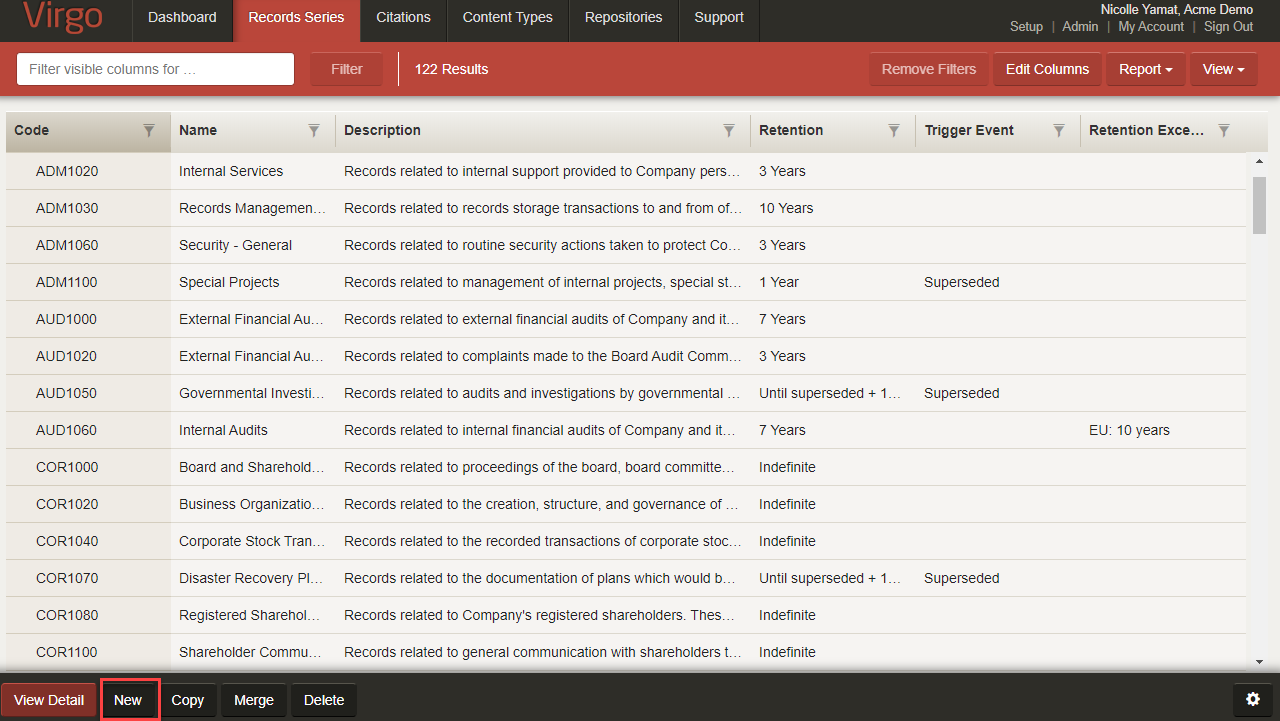
Virgo allows you to add a new record series.
- Click the New button.
 To view an example of adding a new record series, hover your mouse over the image.
-
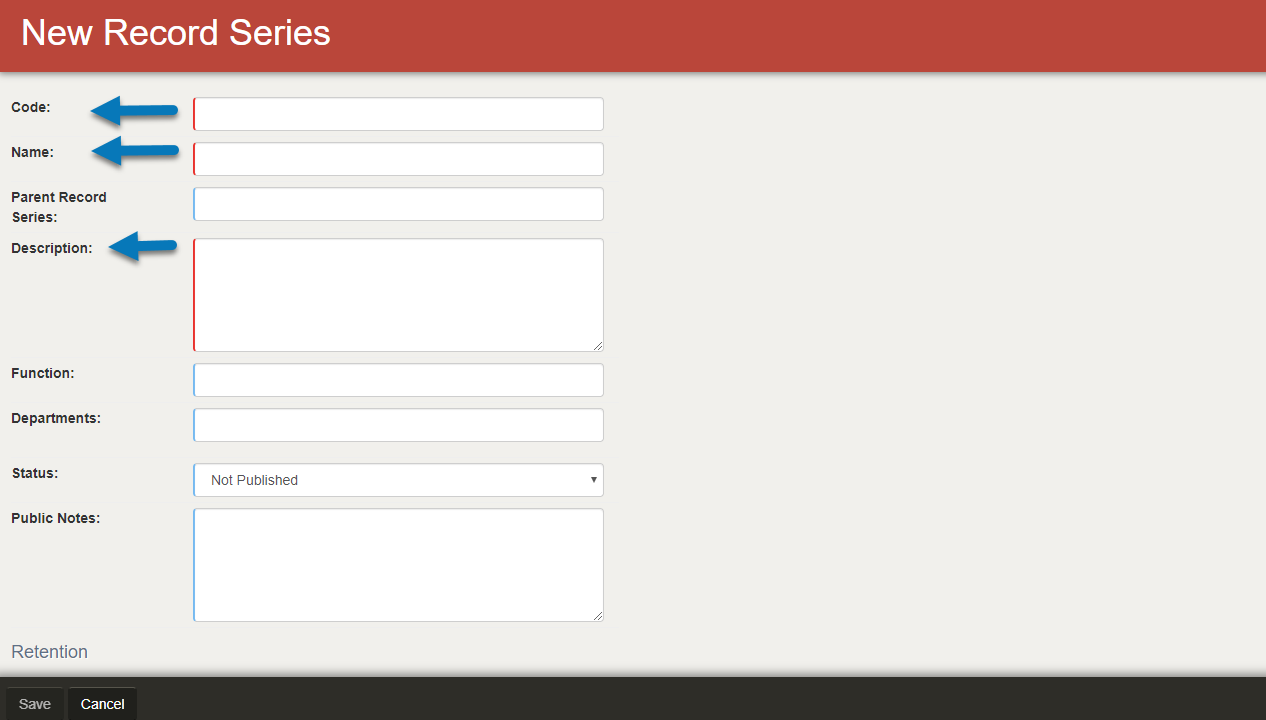
Virgo displays a blank form where you must complete three required fields that are highlighted with a red line: Code, Name, and Description.
- Complete any additional fields.
You can also search single look-up fields and select a value. For example, if the Enable Hierarchy setting is enabled, you can click the magnifying glass icon to perform a Deep Search for Parent Record Series.
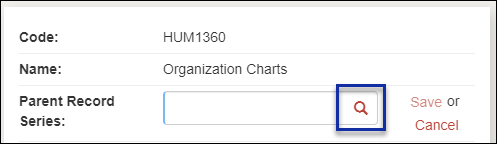
The Deep Search page displays all the potential field values and some basic information for each value. And in the Search field, you can enter a value to filter the results. Select the correct value and click Submit. The field is populated with the new value.
- Click Save.
 To view an example of the required fields necessary for adding a new record series, hover your mouse over the image.
Virgo allows you to edit individual fields within the record series. All fields in Virgo are point and click to edit, so you can easily make changes.
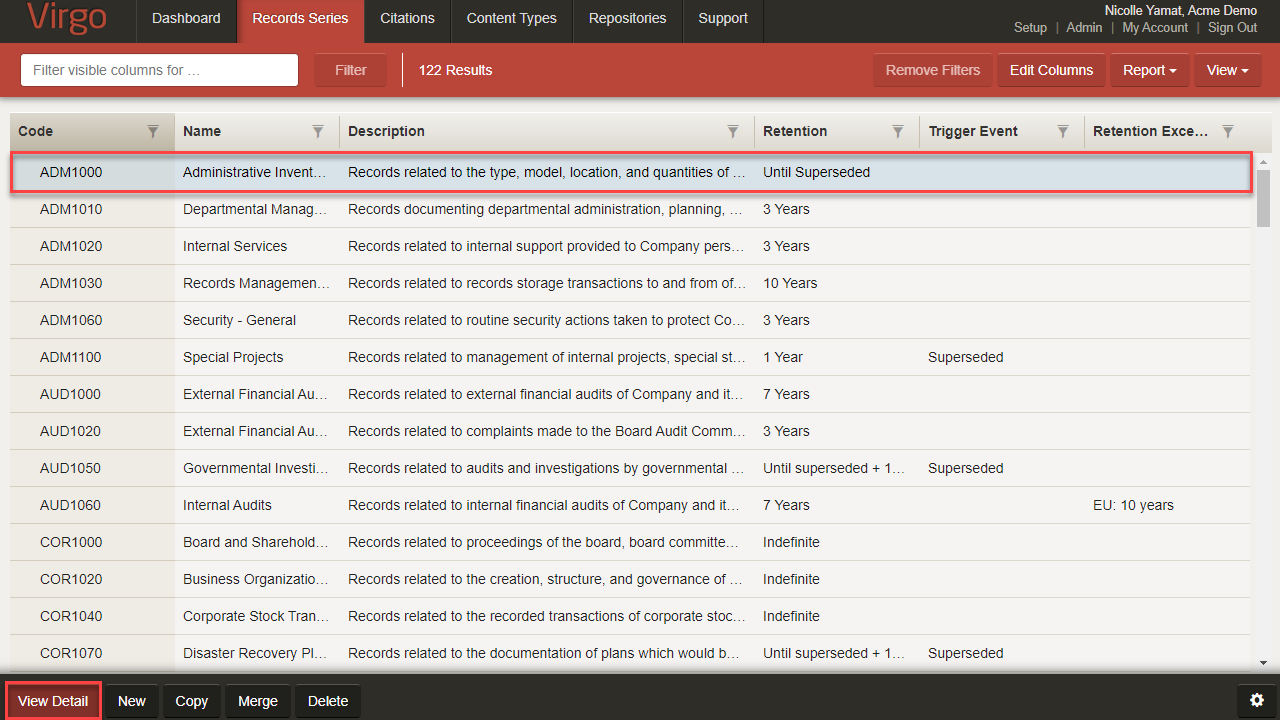
- Double-click on the Record Series you would like to edit or select the Record Series and click View Detail.
 To view an example of how to select an individual record series, hover your mouse over the image.
- You can select any field you would like to edit.
You can also search single look-up fields and select a value. For example, if the Enable Hierarchy setting is enabled, you can click the magnifying glass icon to perform a Deep Search for Parent Record Series.
The Deep Search page displays all the potential field values and some basic information for each value. And in the Search field, you can enter a value to filter the results. Select the correct value and click Submit. The field is populated with the new value.
- Click Save to apply your changes.
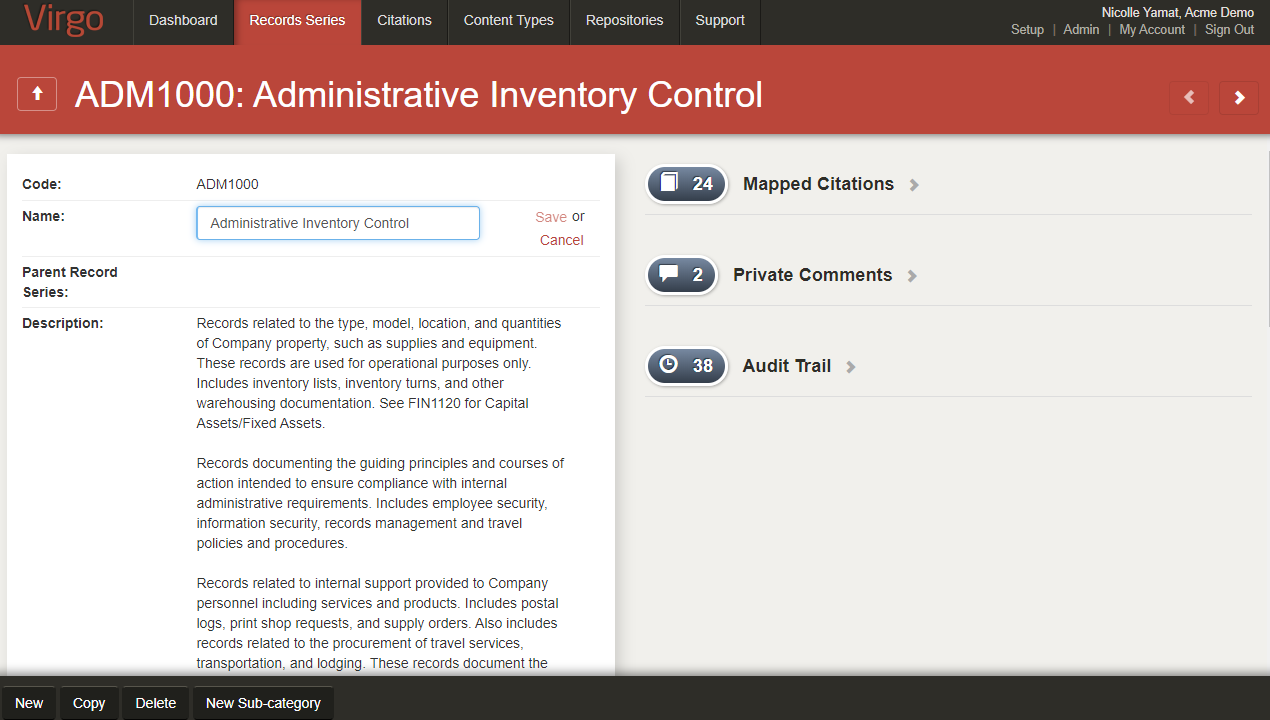 To view an example of editing the Name field within the record series detail view, hover your mouse over the image.
Virgo allows you to copy a record series if you are splitting a record series into two or if there is a variation on an existing record series.
- Select the record series you would like to copy.
- Click the Copy button.
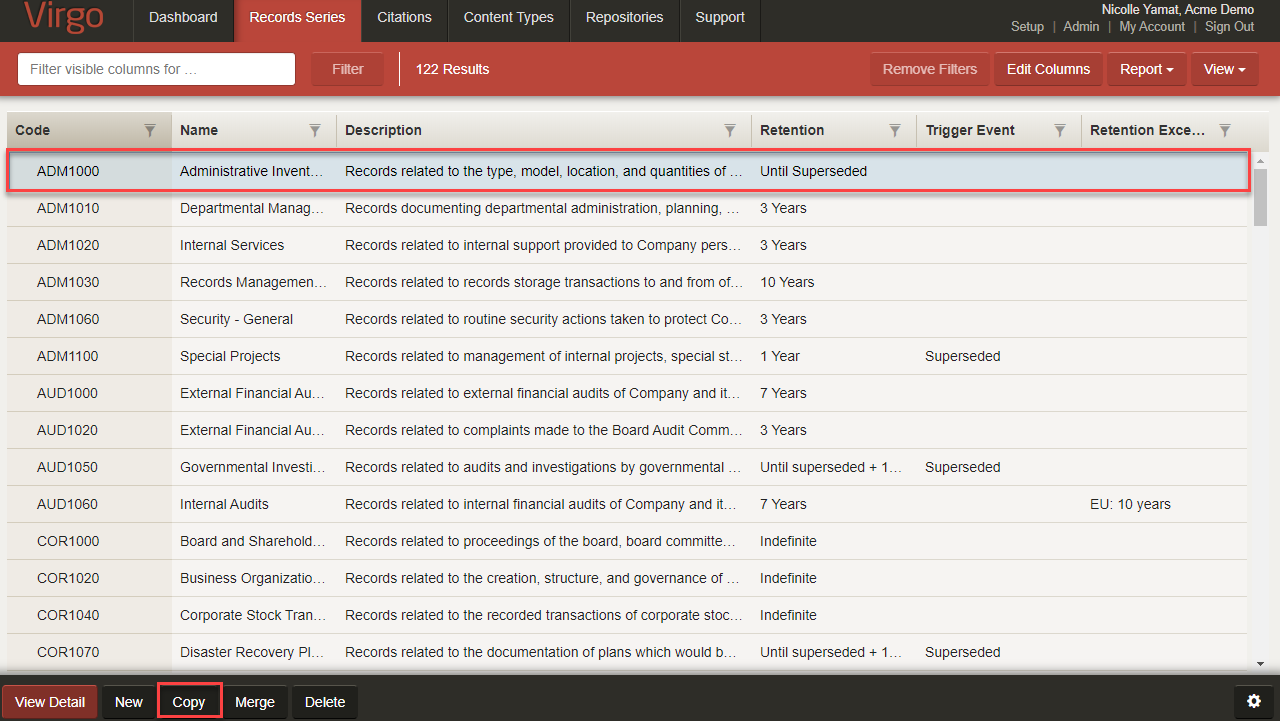 To view an example on how to copy a record series, hover your mouse over the image.
- Virgo will prepopulate all the fields from the record series you are trying to copy. You can make any changes by clicking on the appropriate field. For example, click on the Retention field to update the retention information.
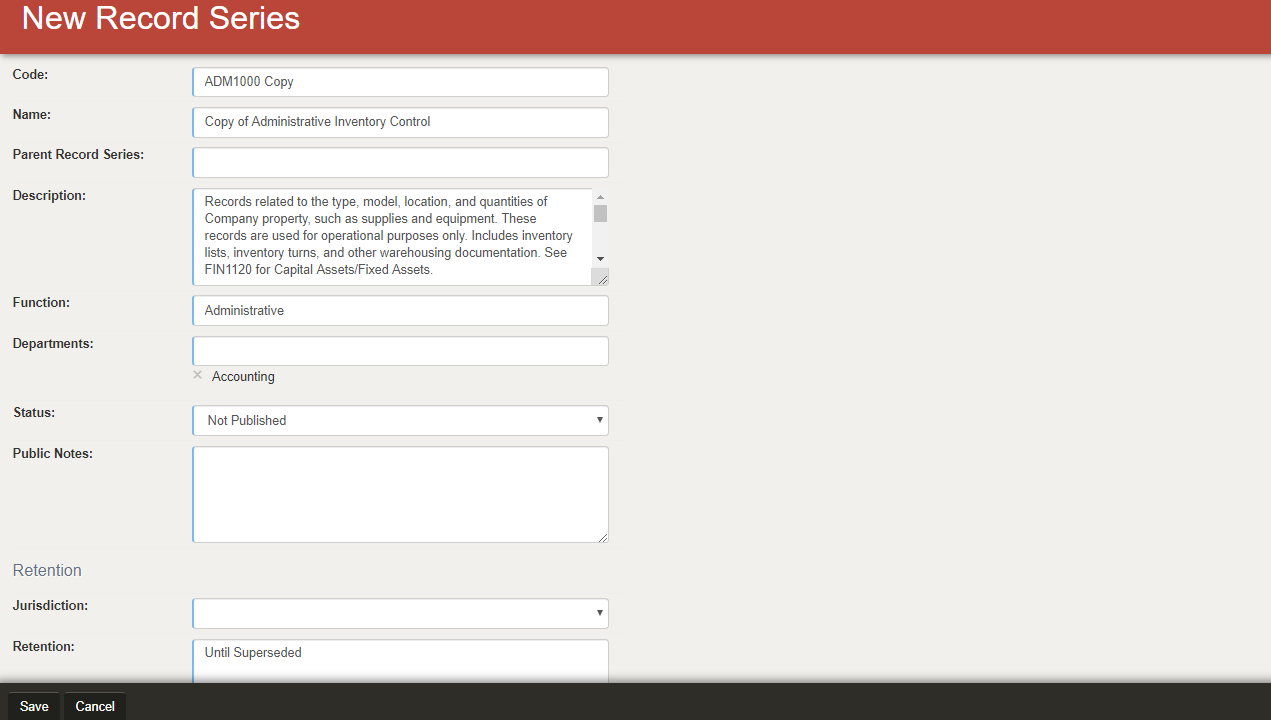 To view an example of the prepopulated fields, hover your mouse over the image.
-
If you scroll to the very bottom, there is an additional field called Mapped Citations. Select Yes to copy citations mapped to the Record Series. Select No to not copy citations mapped to the Record Series.
- Click Save to commit your changes.
 By default Virgo will copy mapped citations to a record series, hover your mouse over the image.
When you’re ready to make your retention schedule leaner, Virgo can help consolidate record series. Virgo’s merge feature allows you to consolidate two or more record series and it takes care of all the details:
- Combine descriptions and edit later.
- Unique merge of mapped citations.
- Unique merge of department tags.
- Unique merge of content types.
- Quickly comment on the merge to record what happened and why.
You will learn how to merge record series.
Length: 1 minute.
- To begin a merge, click on a record series in the grid view. It doesn’t matter if the selected record series is the “winner” or the “loser” in the merge, but you will save a step if you pick the winner first.
- Click the Merge button.
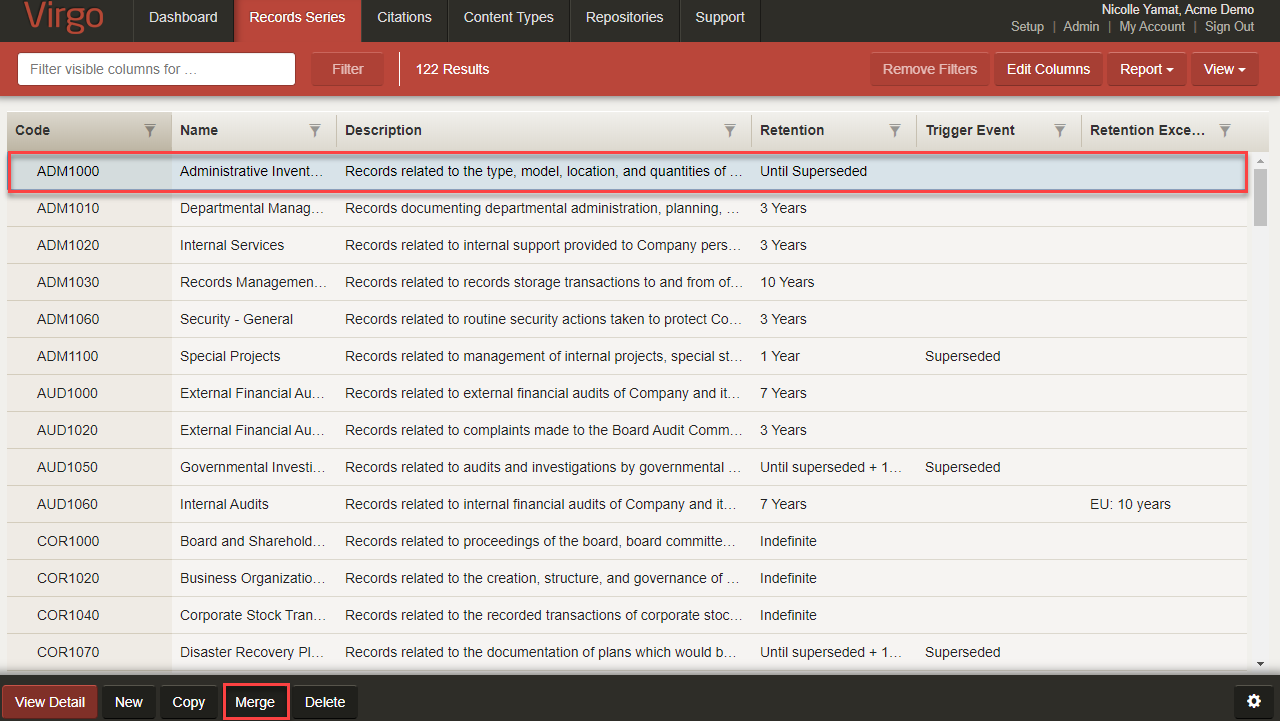 To view an example of how to perform a merge, hover your mouse over the image.
- Select one or more additional record series to include in the merge.
- Click the Merge button.
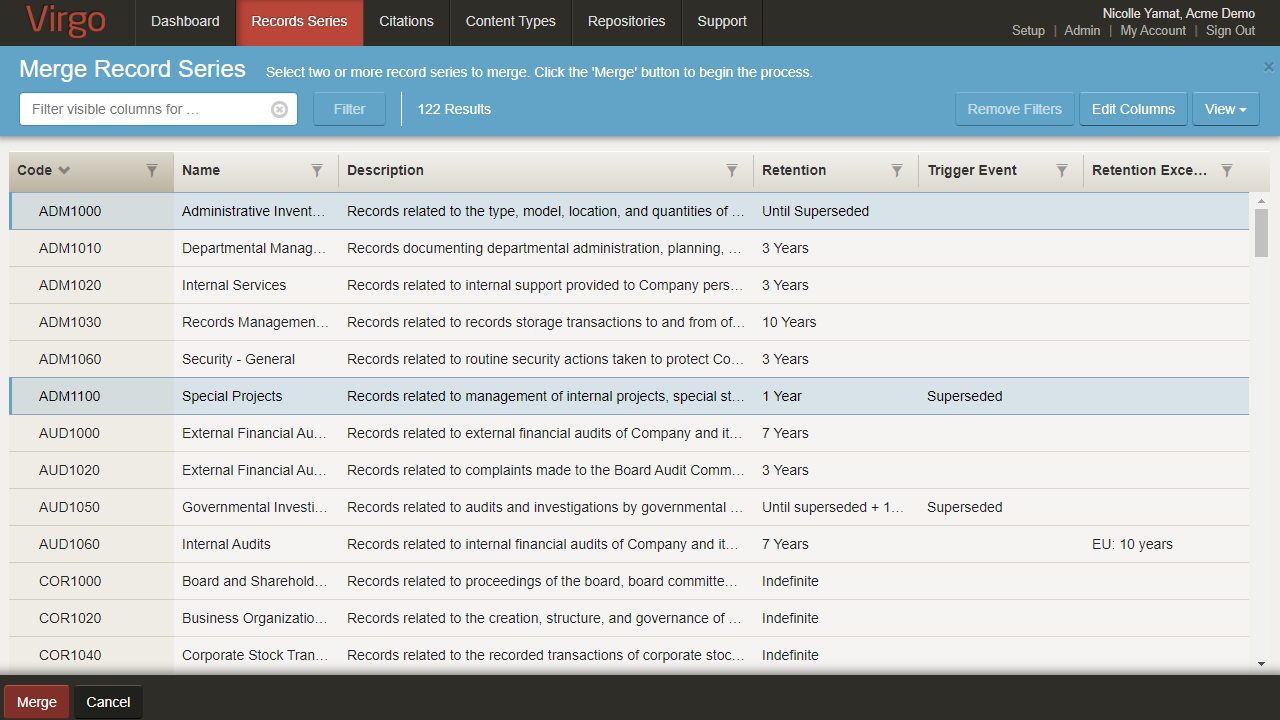 To view an example of the Merge Record Series page, hover your mouse over the image.
- Review the options in the Merge Record Series window. The default options are probably what you want but select what works best for the specific situation.
- In Surviving record series select the "winner." The first record series you selected will be the default.
- In Options review and select the merge options.
- In Comments added to each record series the default comment explains what happened, but you may want to add why it happened.
- Once you have verified your choices, click Merge to complete the process.
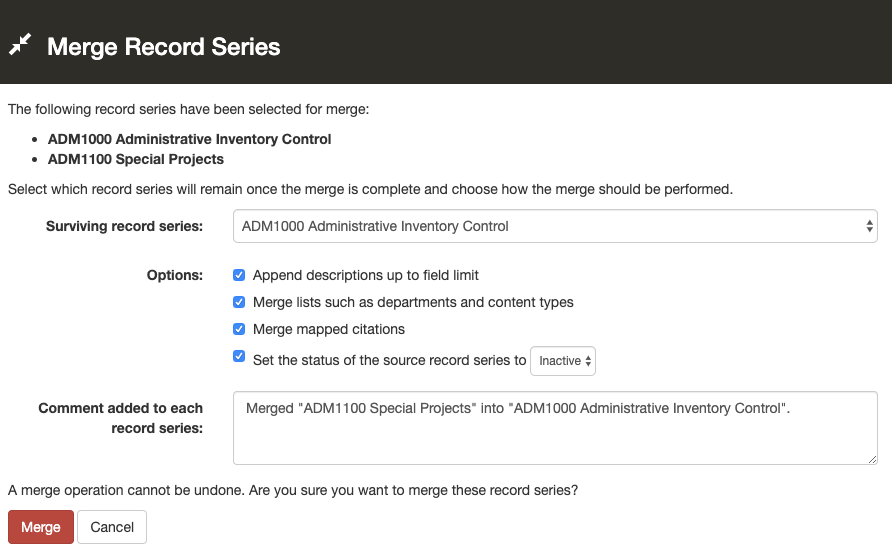 To view an example of the Merge Record Series window, hover your mouse over the image.
TIP: Once you merge, the inactive record series will disappear from the standard views but will not be deleted. To find them, navigate to the View menu and select the Inactive Record Series view. From there, you can change the status of the record series to bring it back into the schedule.
- Select the record series you would like to delete.
- Click the Delete button.
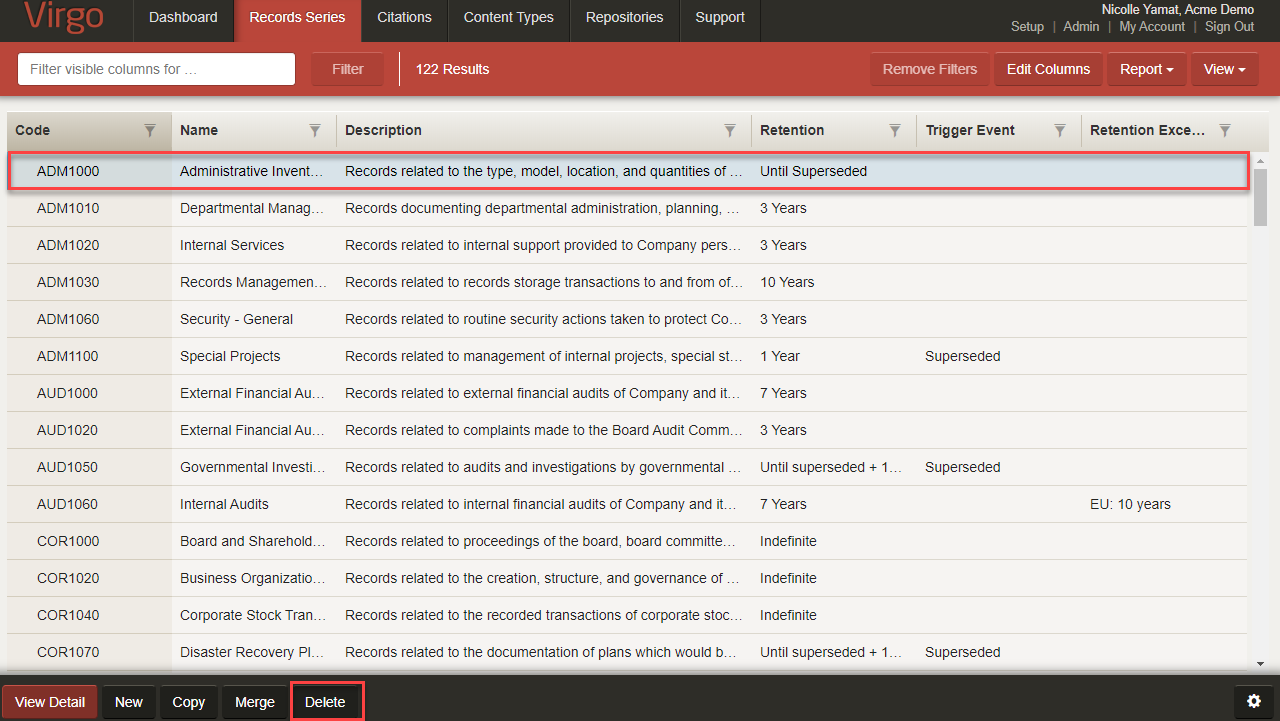 To view an example of how to delete a record series, hover your mouse over the image.
Instead of deleting a record series, Virgo’s inactive status allows you to remove a record series from your published schedule.
- In the record series detail view, locate the Status field and select Inactive.
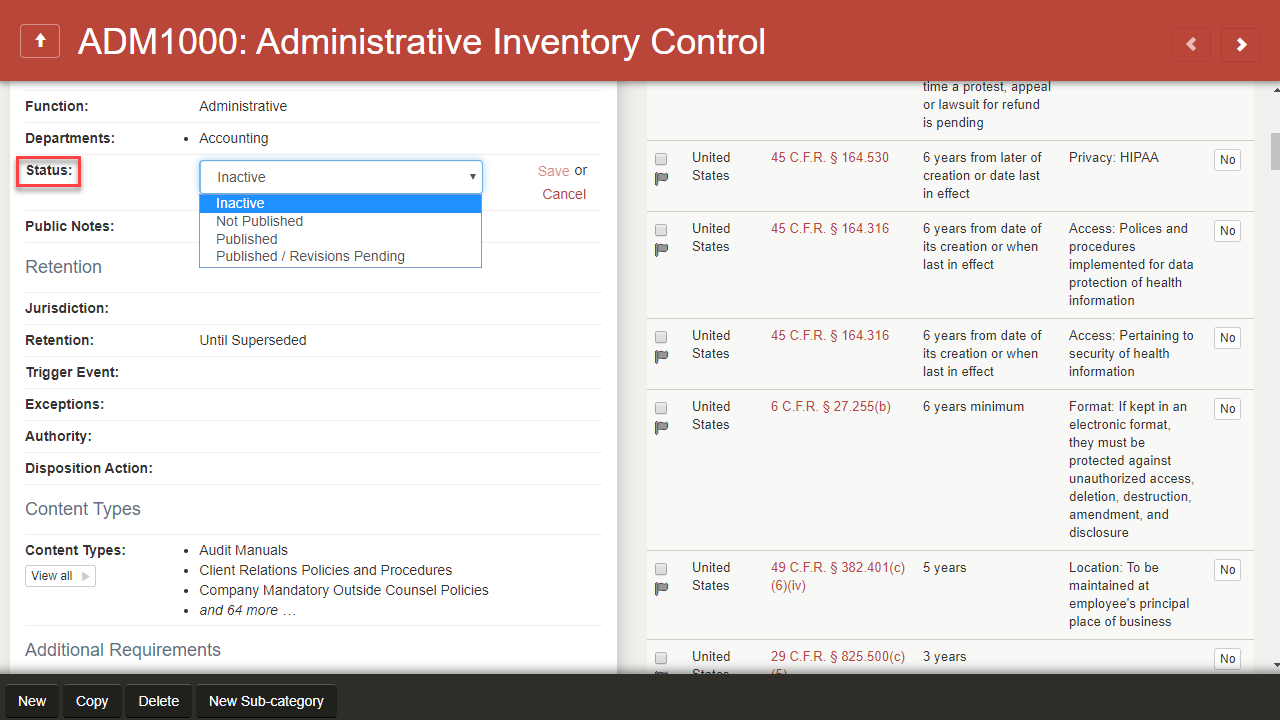 To view an example inactivating a record series, hover your mouse over the image.
- You can access inactive record series in the Inactive Record Series view. Click View and select the Inactive Record Series view.
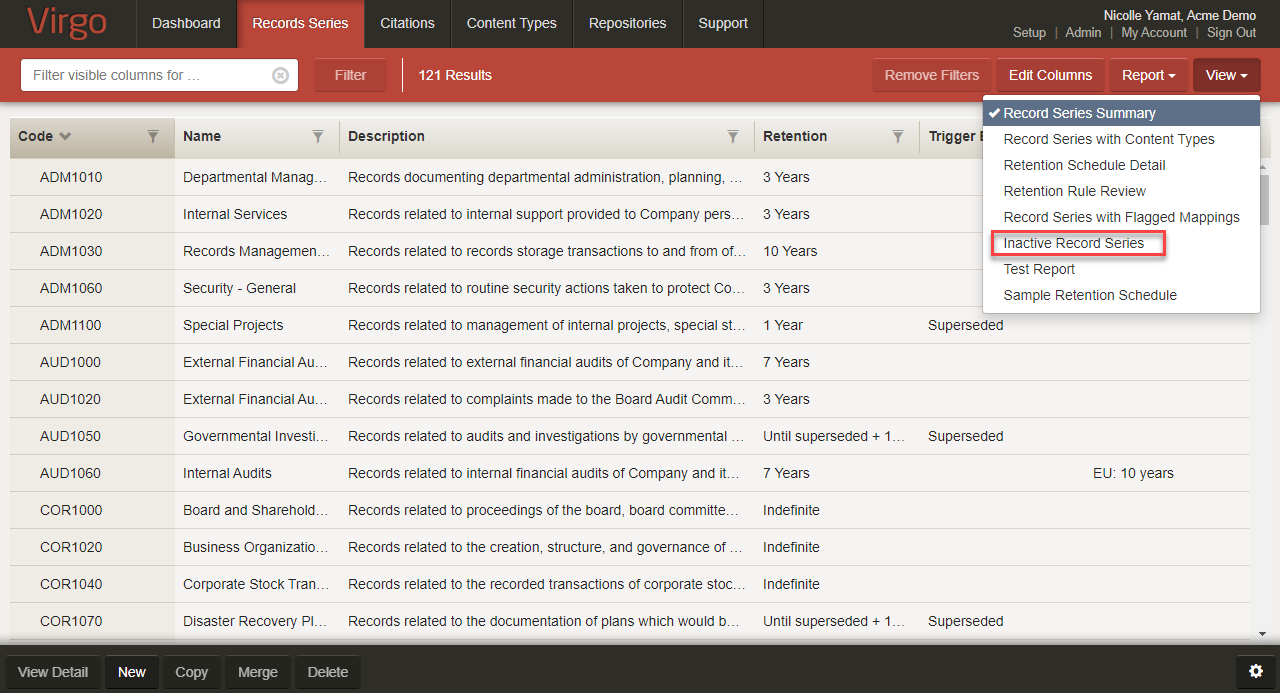 To view the Inactive Record Series view, hover your mouse over the image.
-
To restore a record series, click on the record series you would like to restore.
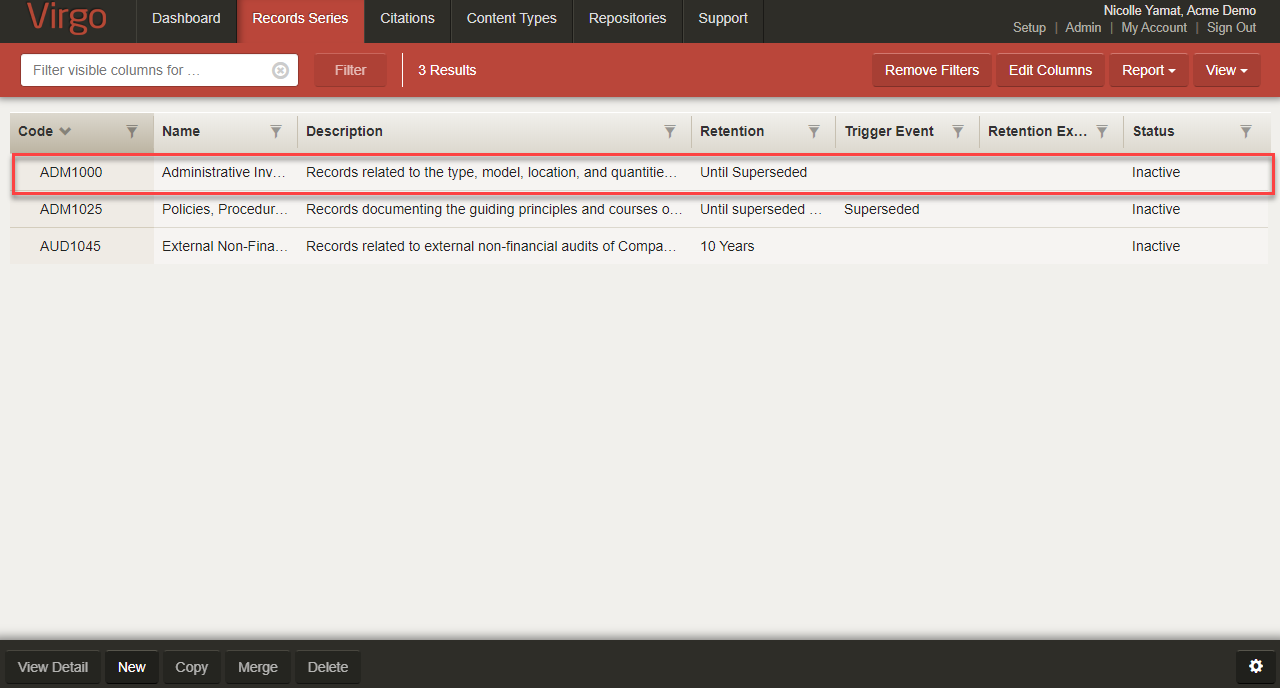 To view an example of selecting a record series to restore, hover your mouse over the image.
-
Change the Status of the record series to bring it back into the schedule.
- Click Save.
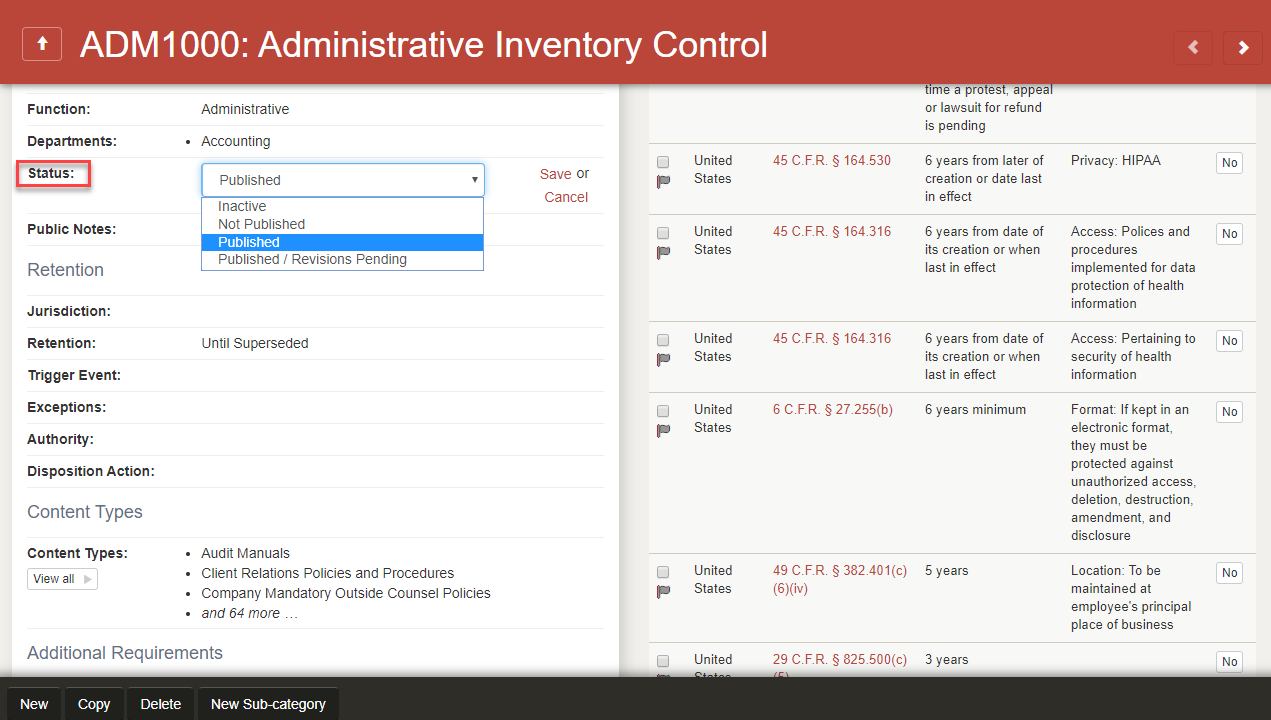 To view an example of changing the status of the record series, hover your mouse over the image.
If the Hierarchical Exceptions feature is enabled and you have a role that allows full control of the record series, you can create a jurisdiction exception which is a child of the Global record series. A Global record series can have an unlimited number of exceptions.
-
On the Record Series tab, select the record series, and then click View Detail.
- Click the Create Exception button.
-
The Create Exception page displays a list of jurisdictions.
-
Select a jurisdiction for the exception.
-
Click Submit. Virgo creates a draft of the new record series for the specific jurisdiction based on the original record series, including the field information. But the Record Series Type field displays Country Exception.
-
Update the fields for the record series.
-
Scroll to the bottom of the New Record Series page.
-
To move the Mapped Citations from the parent record series to the new child record series, in Move Mappings for Jurisdiction select Yes. Virgo will move the mapped citations for the selected jurisdiction from the parent record series and apply them to the new child exception record series.
-
To move the Attestations from the parent record series to the new child record series, in Move Attestations for Jurisdiction select Yes. Virgo will move the attestations for the selected jurisdiction from the parent record series and apply them to the new child exception record series.
-
Enter Comments for both record series.
-
Click Save.
On the Record Series tab grid, you can expand a parent record series to view the child record series.
The Viewing as button lets you view record series by jurisdiction. The default is Global (all jurisdictions). The Viewing as button label is also configurable.

Also, the Record Series Type field indicates if a record series is a standard Global record series or is a Country Exception record series for a specific jurisdiction. Global is the default.
TIP: To delete an exception record series, merge the exception record series into their parent record series.